I did a lot of research and testing for this because this is one of the key parts of the engine and it is very important for the overall performance of the games.
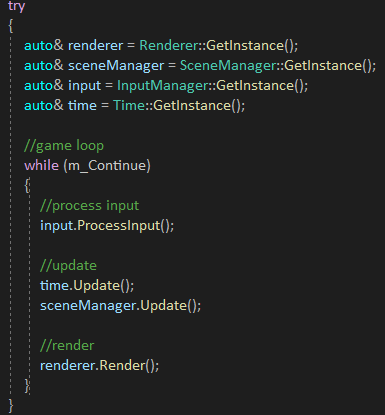
I ended up having a very simple game loop: get the player input -> update the time -> update all the objects -> render all the objects.
However there is still something missing, TIME! At first I tried an implemntation where the game loop would run 60 times per second and thus each loop had a fixed time of 16ms.
If the loop is faster we wait and if its slower we try to catch up in the future by doing multiple updates without rendering. This all worked fine but I realised the games I aim for will be made for PC.
If we were talking about mobile devices and saving battery power this would be a great solution, but we want PC players to have a smoother performance if there hardware allows it.
I ended up creating a singleton time class that calculates how much real time has passed each frame.
I made this into a singleton because I think it is redundant to pass the elapsed time to each update function while most of them don't even use it.
To establish a relationship between classes and objects I chose for composition. I did this because it is very organised and keeps your different functionalities separated. The different components are unrelated to each other and yet work together with the object like they are one unit.
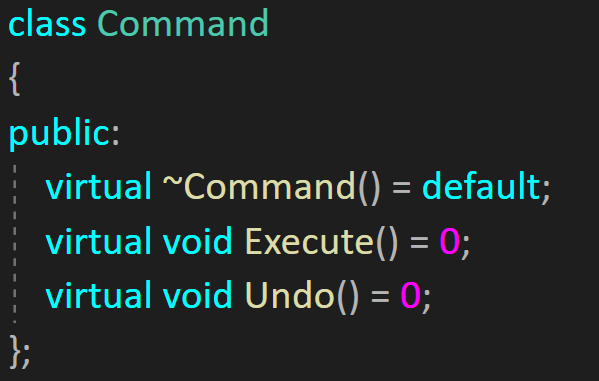
The input manager is a singleton, this allows me to acces it from anywhere in the code without having to pass the instance along the component hierachy. To register the controller input I used the 'Xinput' library. For the keyboard and mouse I used the 'GetAsyncKeyState'function and other functionality from the'WinUser' library. To support me in creating an input manager for both controller and K&M I made use of the'Command'pattern. I do love the command pattern as it gives me a lot of freedom and control. It also supports the model-view-controller pattern.
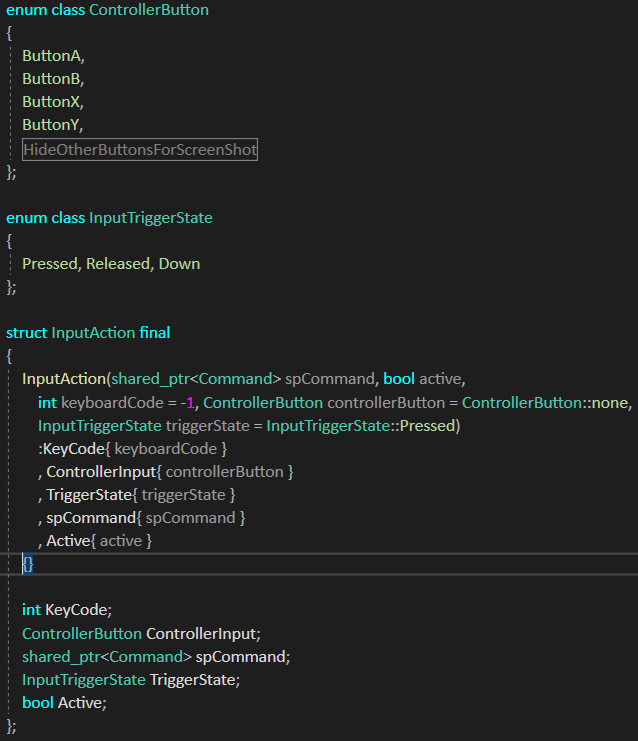
The input is created using an 'InputAction' struct (see image). It allows a developer to select both the K&M input aswell as the controller input. It is possible to activate/deactive the action using the boolean. With the 'InputTriggerState' you can define the type of the action (see image). Finally, using the command pattern you can define the action that happens when the input is triggered.
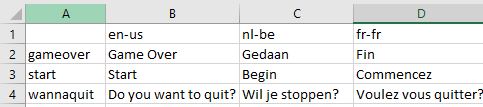
To make it easy for developers to implement different languages I implemented a localization system. This way all you need to do is create an excell file with all the necessary languages and then provide a keyword for every reference to a text. It is now just one call of a function to change the language of the entire game! This could also be used to save different texture and audio files in case some countries have stricter rules.
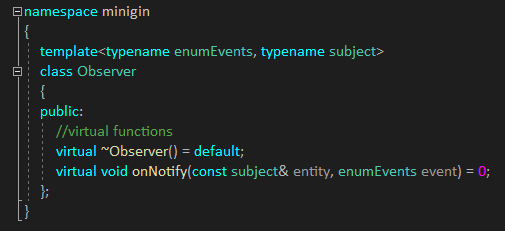
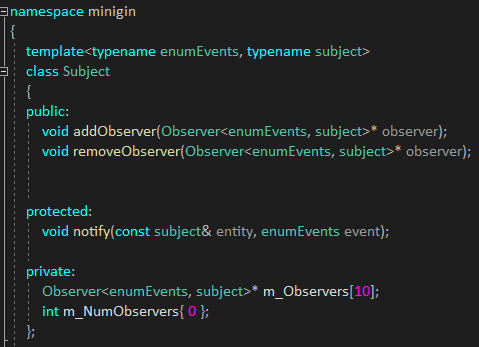
The next pattern that was implemented in the egine is the observer and subject pattern. It is a way to tackle the problem of a piece of code triggering another piece of code somewhere else in the project. Simplified you could say, the pattern implements events! I made the pattern with the c++ templates, this allowes it to be very flexible in use for making games. A common example is an achievement system. However, I have used another example in my engine.
Example:
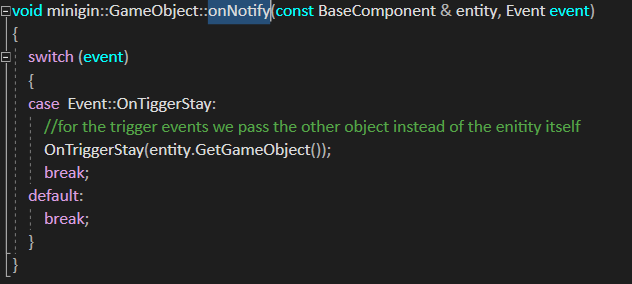
For the test game ( Bubble Bobble) I had to detect collider triggers. The trigger happened in the collider component and is supposed to be handled by the parent gameobject. To solve this issue I made my components a subject of the gameobject. I did this by making my 'BaseComponent' class a child of the 'Subject' class. Next up, I made my 'GameObject' class a child of the observer class. All I had to do now was handle the events in my 'GameObject' class and make the functions virtual so that the inherited classes can choose what to do with the event call.
I like the pattern because it allows the subject to be triggered from all the corners of your code base. You can unify all the necessary functionality in the observer child class and just make the code that triggers the event a child of the subject class.
Subject:

Observer:

Handeling:
This style of coding is very important to organise your project code and seperate functionality. Along with many other things it allows you re-use code more often and save the game state properly. The engine can't force a user to apply this model but the least I could do was support it. The command pattern which is used by my input manager is a great way to seperate the controller part of the code. The effort to seperate the other 2 has to come from the programmer.
Making the engine free of errors is very important but you can never 100% guarantee this. As a starter I put the visual studio compiler to the highest warning level,
this made sure that I could fix the smallest potential issues before they could become a real problem.
I also use a logger. It goes from logging default notes to throwing warnings in potentially dangerous scenarios or throwing errors when things go south.
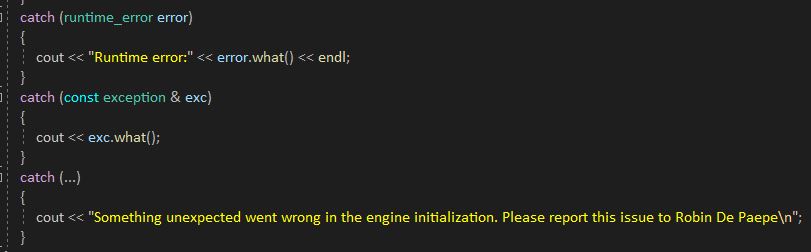
As a backup I have a try-catch around my game loop and engine initialization.
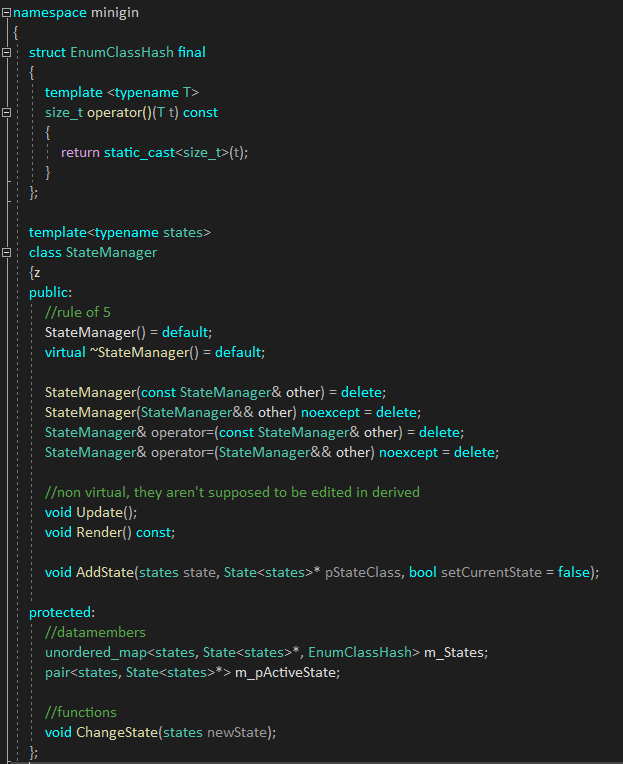
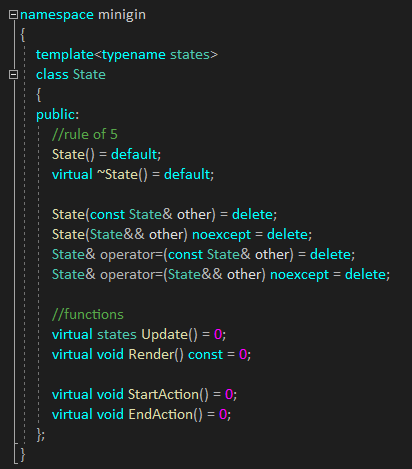
The state pattern is a very usefull tool and without going into to much detail, this is how I used it:
I wanted to make this functionality available for any kind of situation without having to rewrite the same code over and over again. This brought me to creating a templated base class for both the 'state' and the 'statemachine'.
I was a very tricky process and very hard to debug but after extending testing, I can say I am very glad with the results.
For the audio I went with the FMOD library. I chose this because it is a very powerful sound system with many features and it is easy to implement in any project.
To test out all the features, I made a small remake of Bubble Bobble.
Since this was just a fast testing prototype it will not be downloadable on the git page. The egine will be downloadable and you can test it out for your own games!
Player chart:
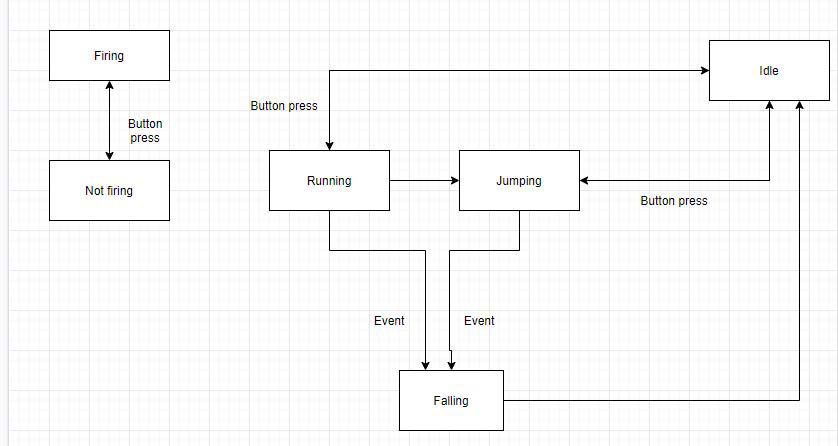
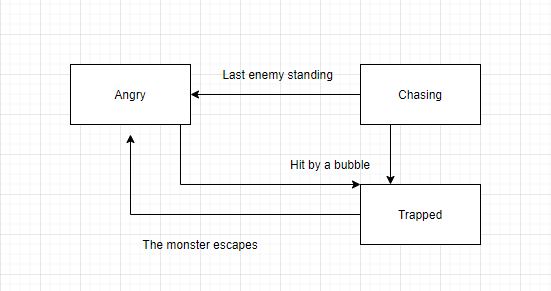
Enemy chart:
The tools I got to use while working on this project: ImGui, FMOD, visual studio and github.