For my first introduction to graphics programming I got to make a basic raytracer that works on the CPU. This obviously is not efficient but this project was all about learning how raytracing works and executing it. If you decide to download the project for yourself and try it out then I would most definitely suggest to run in Release for performance gains.
This project was very interesting to say the least. We started our journey with a given base project that contained math files and a basic main file which had a basic game loop. We then gradually started building up the project. I often stumbled upon hard-to-track mathematical bugs and I struggled to keep track in which 'space' the data was (eg: screen space). Nonetheless I powered through and improved my debugging and organizational skills a lot.
At this time, 2018, raytracing is still losing against rasterization because of the performance costs but I would dare to predict that by the time you are reading this raytracing will have become the new standard in visualizing games.
The tools I got to use while working on this project: perforce and visual studio.

After creating the raytracer we moved on to a rasterizer. The teacher provided us once again with the math files and a basic main file which we still had to make for the most part.
After getting a simple triangle to work the next step was to render quads and eventually meshes. A list of triangles is the obvious and easy solution but next to this I also added a triangle strip. This concept was very interesting to me because its a very smart way to optimize data.
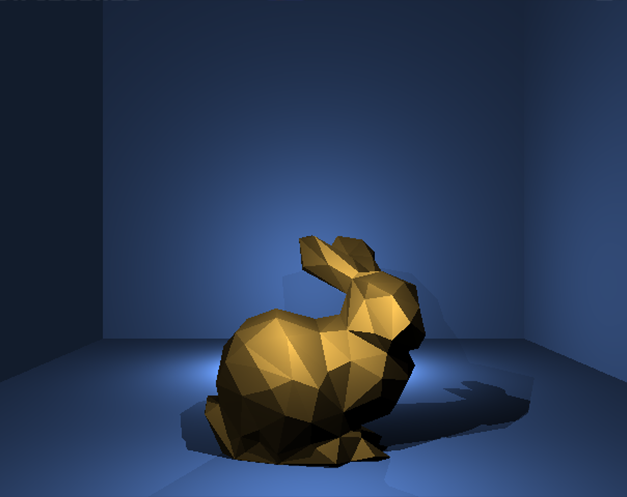
We finished the project and the result looked like this:
The next step was to make a rasterizer work on the GPU so that it runs smooth. The API we used for this was 'DirectX 11'. This API was new for me but after making the rasterizer in normal cC++ code I already understood most of the core concepts. I also got to try out some GPU debuggers while working on this.
After making all the features work with DirectX we also added transparency to the rasterizer. The final task was to merge the cpu version into this new project and be able to switch between the cpu and gpu rendering with a button click.
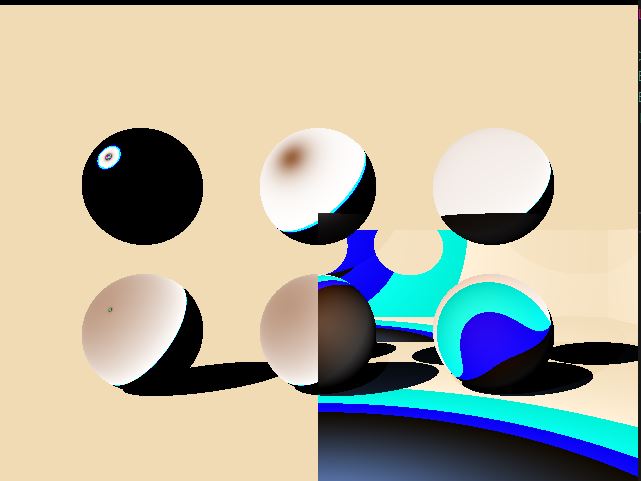
Here you can see the result on the GPU (blue background) and you can see me toggle the transparency and switching to the CPU (Grey background).
The tools I got to use while working on this project: perforce and visual studio.